
2013


//2013-11-12更新—————
发现了一揽子打包安装VPN的方法。
采用AMH面板,众多功能包采用模块式插件安装。
众多模块中包括了PPTP-VPN-1.1 模块(一键安装PPTP-VPN服务);
甚至都不用通过终端命令行添加账户。而直接安装LanYing-VPN-1.0模块(VPN代理服务器对用户的管理,支持PPTP和L2TP方式的VPN代理用户管理)可视化操作添加账户。
对于服务器只用来架设VPN的,可以考虑这种形式安装。简单快捷。
AMH还有SSL的模块,采用SSL的方式也可以破墙。
//自架VPN,4步安装步骤—————–
自架VPN虽然速度不俗,在20M使用带宽下,最高1080p在线视频流量能跑到527kb每秒。
但是在低带宽环境下,表现依旧不如wallproxy的多线程下载。
优势在于,VPN表现平稳,完全模拟服务器所在的上网环境,
由于GAE被大量使用,使用GAE的代理现在越来越多的被各个网站所限制。(维基百科的编辑,youtube的部分视频。)
VPS配置:洛杉矶 OpenVZ VPS 512MB 100M共享带宽
系统环境: CentOS5.4 无web环境
也试了一个 Xen VPS – 64MB 的,效果也不差,
只是64M内存看着实在揪心,除了vpn其它估计什么也做不了。
以下,VPN的搭建记录:
1–确保服务器配置天生支持pptp的VPN(很多VPS后台具有TUN和ppp的开关)。
cat /dev/net/tun

//cat: /dev/net/tun: File descriptor in bad state

//返回上面这句“File descriptor in bad state”则确定可以安装,继续下面步骤。
2–进入安装步骤;
//安装环境软件依赖:

yum makecache

yum -y update

yum -y install ppp wget iptables iptables-devel perl
3–使用googlecode的pptp资源,安装pptp。
//32位安装:

rpm -ivh http://acelnmp.googlecode.com/files/pptpd-1.3.4-1.rhel5.1.i386.rpm

//64位安装:

rpm -ivh http://acelnmp.googlecode.com/files/pptpd-1.3.4-1.rhel5.1.x86_64.rpm
4–配置参数:
vim /etc/pptpd.conf

//去掉以下两句的注释:

localip 192.168.0.1

remoteip 192.168.0.234-238,192.168.0.245

vim /etc/ppp/options.pptpd

//去掉ms-dns的注释,并修改为8.8.8.8和8.8.4.4:

ms-dns 8.8.8.8

ms-dns 8.8.4.4
vim /etc/sysctl.conf
//修改net.ipv4.ip_forward=0,改为1,
//并注释net.ipv4.tcp_syncookies = 1
net.ipv4.ip_forward=1
# net.ipv4.tcp_syncookies = 1
//保存后执行下面一句
sysctl -p
//添加VPN账号和配置密码。
vim /etc/ppp/chap-secrets
zhanghao pptpd mima *
//如上格式,zhanghao代表用户名,mima为密码,
//可多行建立多个VPN帐号
//添加iptables规则。OpenVZ虚拟环境执行:(xxxx为VPS的IP地址)
iptables -t nat -A POSTROUTING -s 192.168.0.0/24 -j SNAT --to-source X.X.X.X
//Xen的虚拟环境执行:
iptables -t nat -A POSTROUTING -s 192.168.0.0/24 -o eth0 -j MASQUERADE
//最后各种重启,启动,以及设置开机启动。
/etc/init.d/iptables save
/etc/init.d/iptables restart
/etc/init.d/pptpd restart
chkconfig pptpd on
chkconfig iptables on
搞定。
pc,mac ,手机,所有平台无需任何客户端和配置,就可以链接了


//更改mysql自身数据库‘mysql’

use mysql;

select host,user,password from user;
//%允许任何主机连接本数据库,
grant all privileges on *.* to 'root'@'%' identified by 'XXXXXXXXX' with grant option;
//重置mysql服务;
flush privileges;
//退出mysql
exit;
//如果有防火墙,确保打开3306端口
iptables -I INPUT -p tcp -m state --state NEW -m tcp --dport 3306 -j ACCEPT
//开关防火墙(重启)
chkconfig iptables on
chkconfig iptables off
//临时开关防火墙
service iptables start
service iptables stop
//连接方命令:
mysql -u root -p -h 地址

安装版本:php5.5
nginx:1.5.3
PHP:5.5.1
CentOS 5.4 32位 php-fpm编译配置参数:
./configure –prefix=/usr/local/php –with-config-file-path=/usr/local/php/etc –with-mysql=/usr/ –with-iconv-dir –with-freetype-dir –with-jpeg-dir –with-png-dir –with-zlib –with-libxml-dir=/usr –enable-xml –disable-rpath –enable-discard-path –enable-magic-quotes –enable-safe-mode –enable-bcmath –enable-shmop –enable-sysvsem –enable-inline-optimization –with-curl –with-curlwrappers –enable-mbregex –enable-fastcgi –enable-fpm –enable-force-cgi-redirect –enable-mbstring –with-mcrypt –enable-ftp –with-gd –enable-gd-native-ttf –with-openssl –with-mhash –enable-pcntl –enable-sockets –with-xmlrpc –enable-zip –enable-soap –without-pear –with-gettext –with-mime-magic
报错一个:
configure: error: Please reinstall the libcurl distribution – easy.h should be in <curl-dir>/include/curl/
解决方法: yum -y install curl-devel

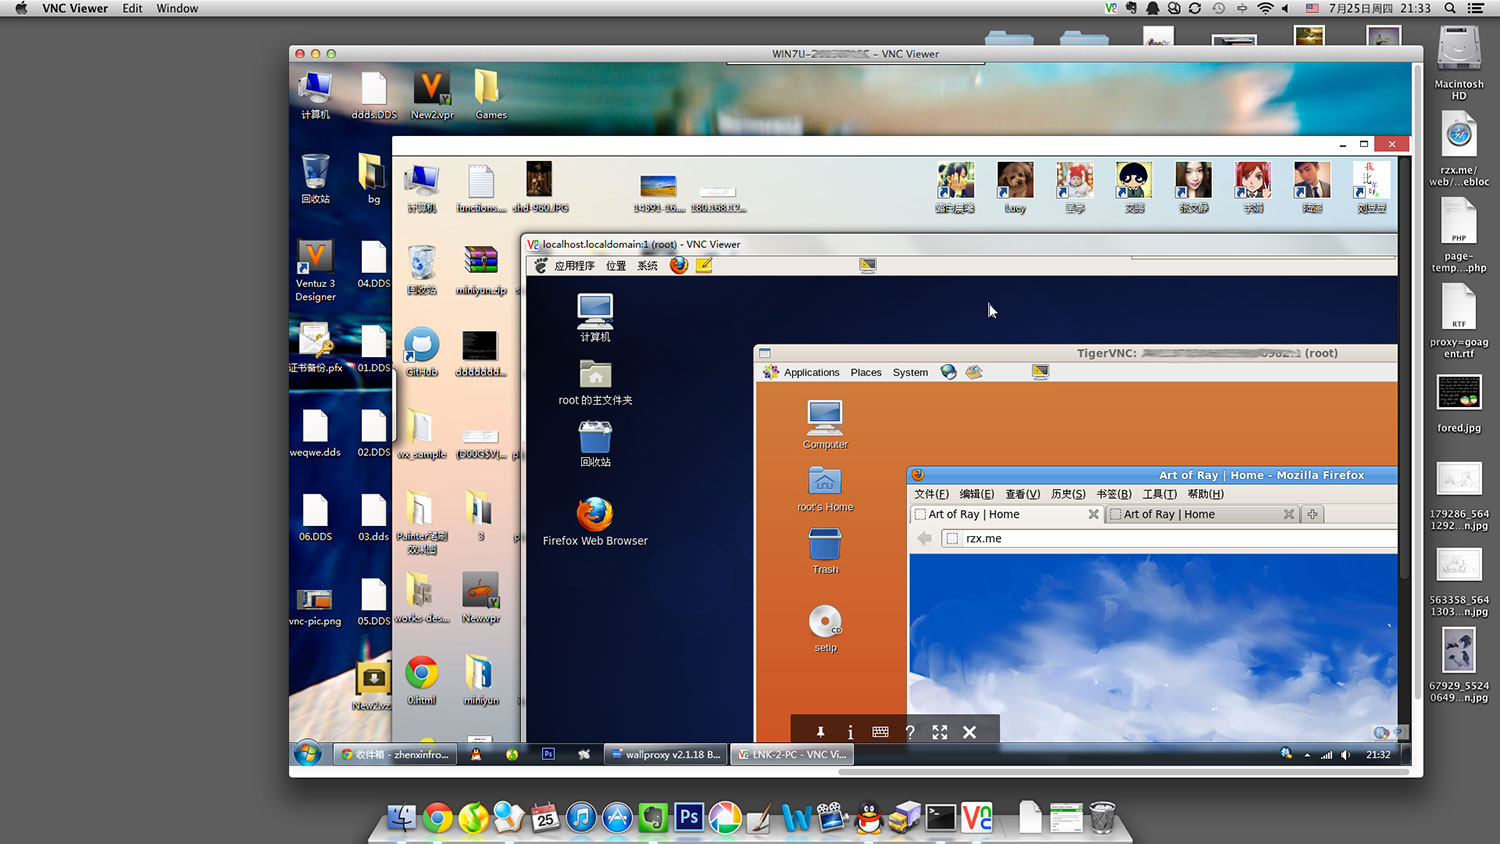
尝试了一下,VNC远程桌面嵌套6层的情况。目前常见平台都在其中,iOS,MacOS,Windows,Linux(CentOS)。
三个带宽环境,家50M,公司20M,以及2M的服务器。

VNC轻量级,跨平台,操控稳定
iPhone–》iMAC–》PC笔记本–》公司PC–》公司内部服务器(Linux)–》网络服务器(Linux)
图形效果都是最优,其中包括了2台Window的双屏机器,一共4块1920X720屏幕和1块1366X768屏,1快1200X800屏。
即便在离最后一层相差4个终端的Mac,依然可以通过键盘输入向网络服务器系统中输入信息。
客户端(工具)使用:
iPhone使用 ” VNC Viewer ” AppStore下载
Mac使用 “VNC Server for Mac”接受控制,“VNC Viewer for Mac”控制 VNC官网下载
PC笔记本使用 “VNC Server”接受控制, “VNC Viewer for Google Chrome”控制 Chrome应用商店下载
台式PC 使用 “VNC Server”接受控制, “VNC Viewer ”控制;
两台Linux服务器(CentOS系统) 使用 “tiger vnc” Yum安装
其中的“VNC Viewer for Google Chrome” 谷歌浏览器的VNC插件,感觉超棒。如果只用作客户端,免去了单独安装VNC程序的麻烦,亮点是作为Chrome插件,帐号同步!!!
遗憾的是,在Mac平台的Chrome上不能支持—“此计算机不支持该应用。已停止安装”
关于跨网连接部分:
本地局域网ip被外网访问。使用的是花生壳动态IP解析服务。
用花生壳客户端,将动态局域网ip绑定到花生壳的域名中。
其中似乎直接使用80端口映射内网的5901端口不起作用,不能连接,
必须使用非80端口映射。(未验证)
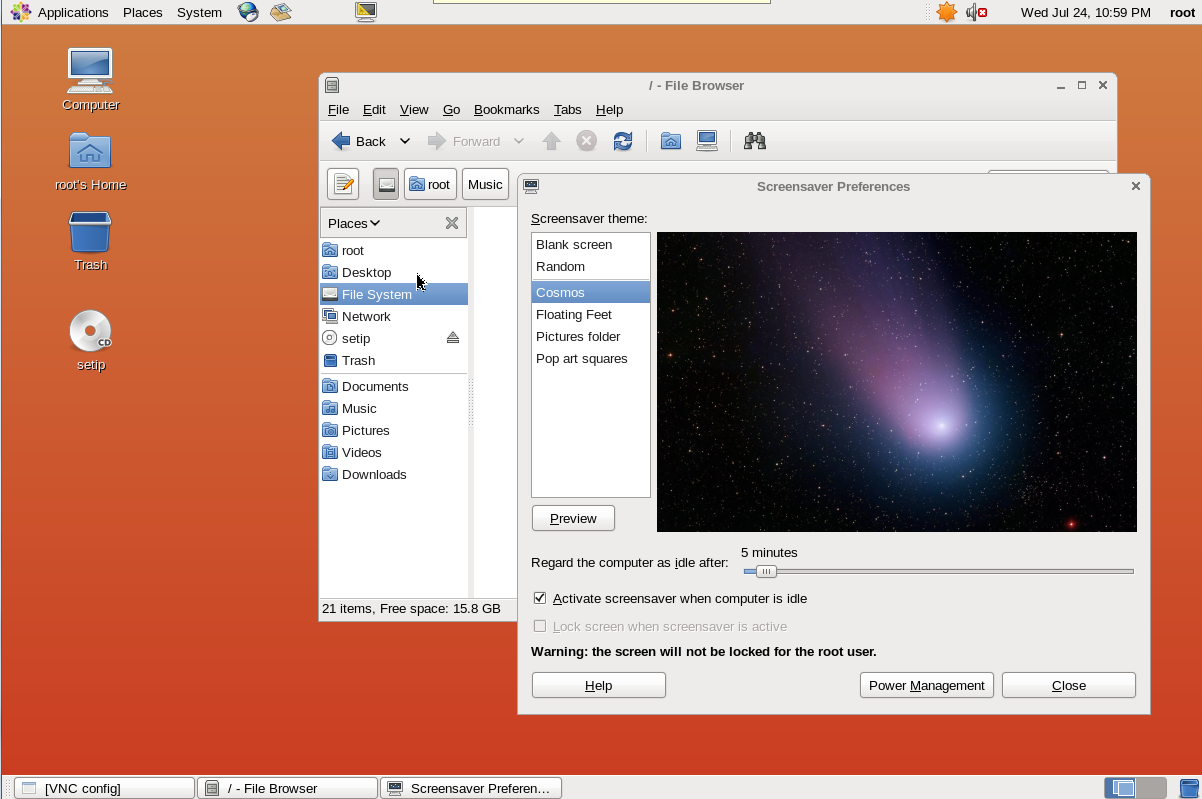
2G内存的服务器开启Gnome图形化界面应该没什么问题。
1G还有512M的内存的就不敢开启了,现在内存正常状态就已经60%左右了。

按照阿里官方步骤:
一.配置163的yum源
1.导入CentOS-6的GPG证书
rpm –import http://mirrors.163.com/centos/RPM-GPG-KEY-CentOS-6
2.让yum使用网易的源:
cd /etc/yum.repos.d/
wget http://mirrors.163.com/.help/CentOS-Base-163.repo
3.修改repo文件
在所有mirrorlist前面加上#,把所有$releasever替换成6,保存
sed -i ‘/mirrorlist/d’ CentOS-Base-163.repo
sed -i ‘/\[addons\]/,/^$/d’ CentOS-Base-163.repo
sed -i ‘s/\$releasever/6/’ CentOS-Base-163.repo
sed -i ‘s/RPM-GPG-KEY-CentOS-5/RPM-GPG-KEY-CentOS-6/’ CentOS-Base-163.repo
4.清理并重新生成yum缓存
yum clean metadata
#yum makecache
二.安装gnome图形化桌面
yum groupinstall -y “X Window System”
yum groupinstall -y “Desktop”
yum groupinstall -y “Chinese Support”
三.安装vncserver并配置
1.安装vncserver
yum install -y tigervnc-server
2.配置vncserver
1).配置为开机自启动
chkconfig –level 345 vncserver on
2).配置vnc密码
vncserver
You will require a password to access your desktop.
Password:
Verify:
3).配置为使用gnome桌面
修改 /root/.vnc/xstartup文件,把最后的 twm & 删掉 加上 gnome-session &
4).配置vncserver启动后监听端口和环境参数
修改/etc/sysconfig/vncservers 文件添加以下内容
VNCSERVERS=”1:root”
桌面号:用户 监听 590* 端口
VNCSERVERARGS[1]=”-geometry 1200×800″
5).重启vncserver服务
service vncserver restart
四.允许root访问图形界面和生成新的machine-id
sed -i ‘s/.*!= root.*/#&/’ /etc/pam.d/gdm
dbus-uuidgen >/var/lib/dbus/machine-id
五.关闭selinux和NetworkManager服务
1.检查selinux服务并关闭
vi /etc/selinux/config
确认里面的SELINUX字段的值是disabled,如果不是则改为disabled。
2.关闭NetworkManager服务
chkconfig –del NetworkManager
结束。
服务器(阿里云的CentOS6.3)执行此操作顺利完成。
我没有执行安装中文语言包:『yum groupinstall -y “Chinese Support”』
原因还是:出现中文的东西总是会很麻烦,能不用中文绝不用中文.
也能显的更轻量级一点,(虽然图形界面已经代表了臃肿)
光盘装的本地台式机CentOS6.3同样的步骤,
重启Vncserver服务是出现以下报错:
the first attempt to start Xvnc failed possibly because the font catalog is not properly configured attenpting to determine an appropriate font path for this system and restart Xvnc using that font path……
解决:
需要更新安装,最新字体包:
执行:yum install pixman pixman-devel libXfont -y
升级后,再次重启vncserver,问题解决。
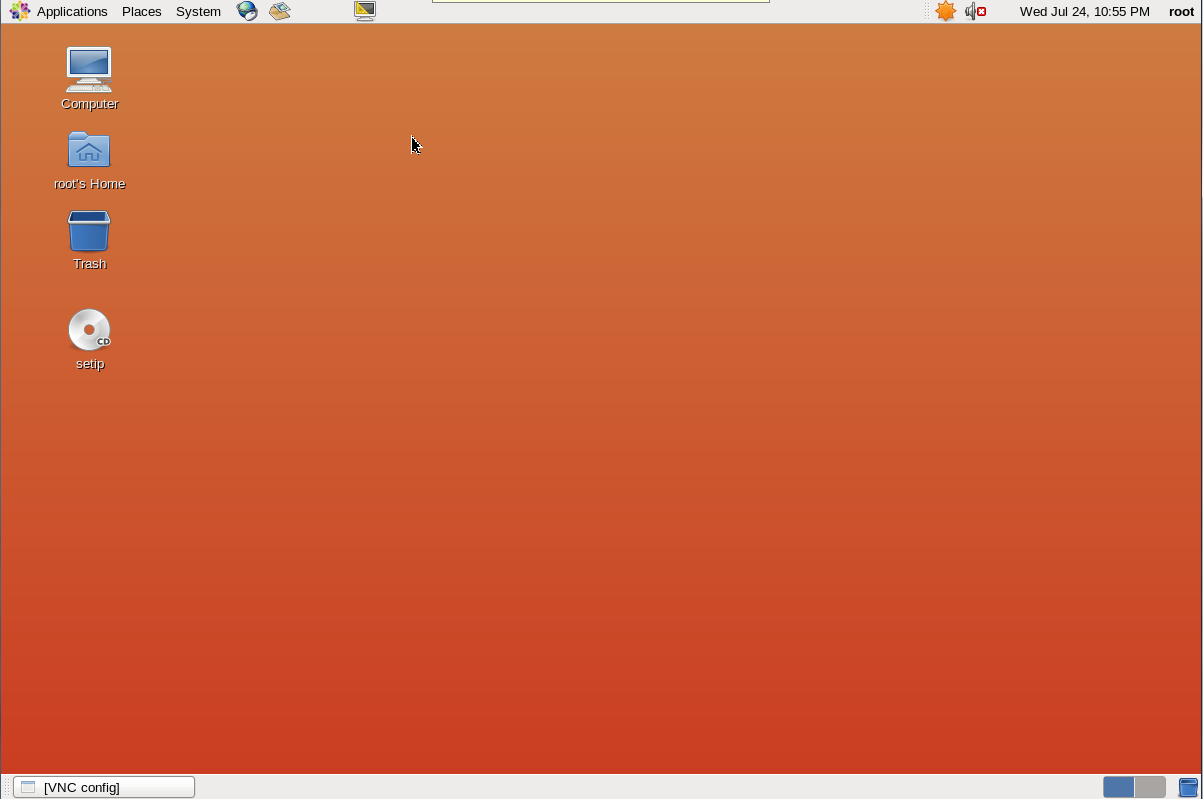 折腾过后,最终的结论是: 图形化界面真的没什么用…..使用上,徒生20-170kb每秒的带宽占用。
还是SSH最快捷。